Effective Troubleshooting Methods to Fix Sleep Issue for Windows 10
Table of Contents
- Major Types of Sleep Mode Issues
- Methods to Fix Sleep Mode Issues
- Method-1: Find out what is stopping windows 10 from sleeping
- Method-2: Disable the wake timers
- Method-3: Allow the computer to sleep
- Method-4: Disable the fast startup
- Method-5: Disable the screen saver
- Method-6: Take a look at the sleep settings
- Method-7: Perform a clean boot
- Method-8: Use the windows troubleshooter to fix the sleep issue for windows 10
- Method-9: Update your windows 10
- Method-10: Disable the hybrid mode
- Additional Troubleshooting Methods
- Method-11: Scan the PC for viruses and malware
- Method 12: Disconnect the peripheral devices
- Conclusion
Windows operating systems are particularly popular as most people all over the globe use windows for both personal and professional use. The latest edition to this Windows operating system, the Windows 10 is nothing short of brilliance but then again, it is not perfect.
Users of Windows 10 often experience issues with the latest in the line becoming a popular question on the internet that goes like “how to fix it when my computer is not sleeping?”. The sleep issue for windows 10 has become quite common these days and can occur due to several reasons. From the interference of third-party software to device driver issues.
These are some of the major causes as to why your Windows 10 won’t go to sleep. In case you are looking for a way out of this problem, simply read our blog till the end to know how you can fix this issue without doing much.
But before we get into troubleshooting, let us take a look at the major types of sleep issues that users encounter.
2 major types of sleep mode issues
There are two major sleep mode issues on Windows 10 and both of them are listed below;
- The system won’t go to sleep in Windows 10
- Sleep option is missing in Windows 10
Now that we know about the type of sleep issue that a user can face, let us take a look at the appropriate solutions that can help a user to fix this issue for Windows 10 with relative ease.
Different ways to fix Windows 10 sleep issue
Method 1- Find out what is stopping windows 10 from sleeping
Here are the steps that can help you find the cause behind the sleep issue for your Windows 10 operating system.
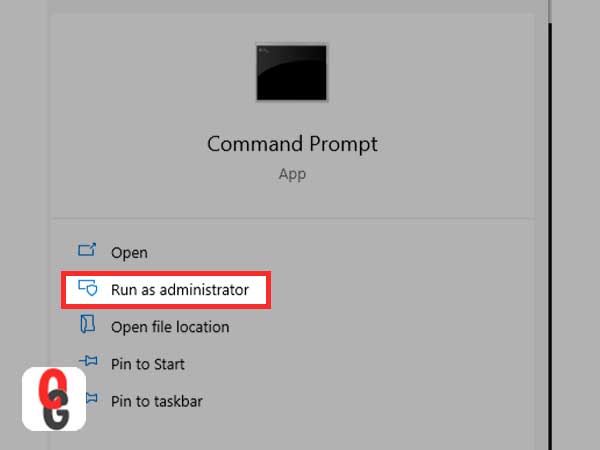
- Open your Windows search box and type CMD. From the result that appears, right-click on the command prompt icon to run it as an administrator.

- Now, simply run the command to know about the applications that are hindering sleep mode other than the basic applications.
- If you want to learn about the applications that hinder the sleep mode, always run the given command.

Note: The result of this will display all of the applications which hinder sleep. Simply try to locate the application at fault and uninstall it. If by chance, the cause of this issue seems to be originating from a software program that you have installed, simply uninstall it from the control panel.
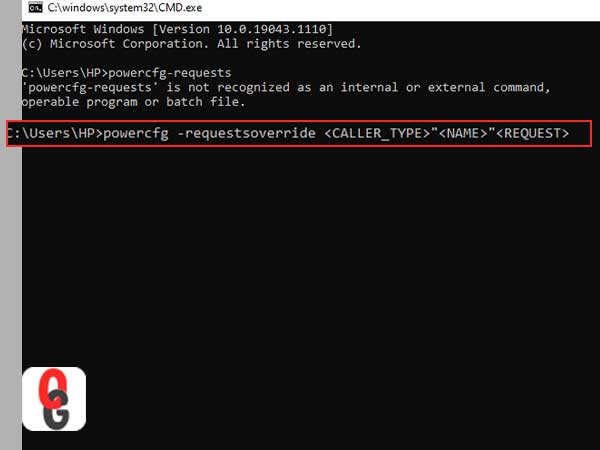
In case you want to disable the process directly from the command prompt, simply run the command given below;
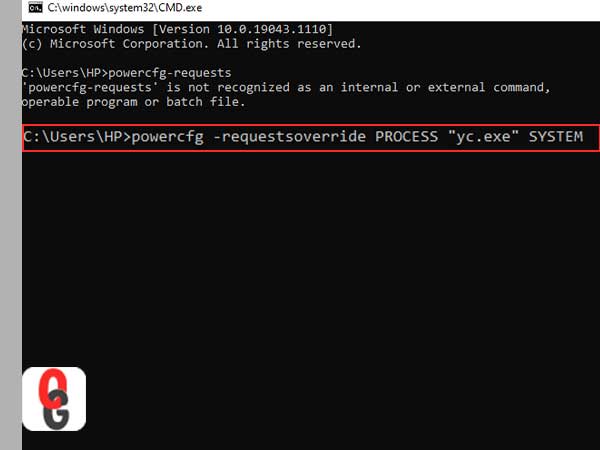
For instance, let us just say that the cause of this issue is process yc.exe. if this is the case, then you will need to run the following command.
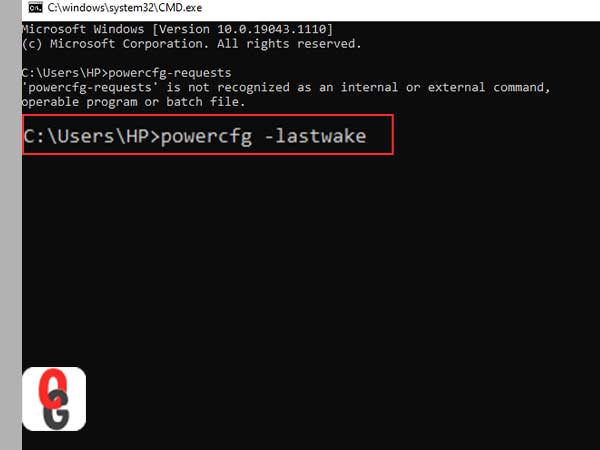
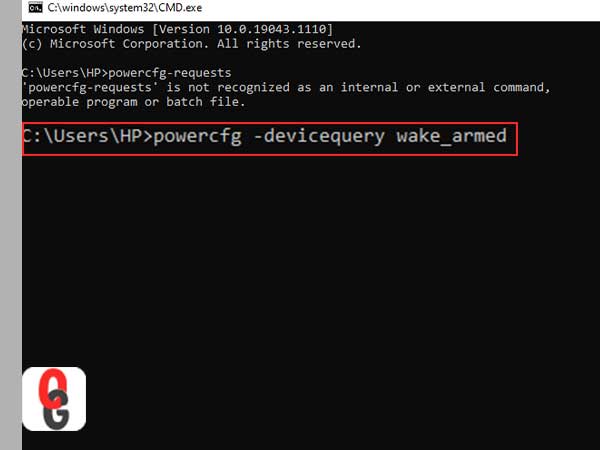
- If you want to know who prevented your laptop from going to sleep, run the given command;
- If you want to know about all of the devices that wake up your system, enter this command;
For instance, the issue seems to be originating from a network adaptor, you need to use the steps that are given below;
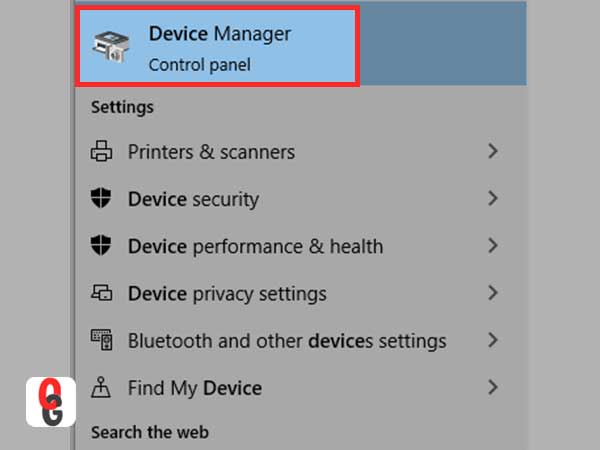
- Type device manager in your Windows 10 search box.
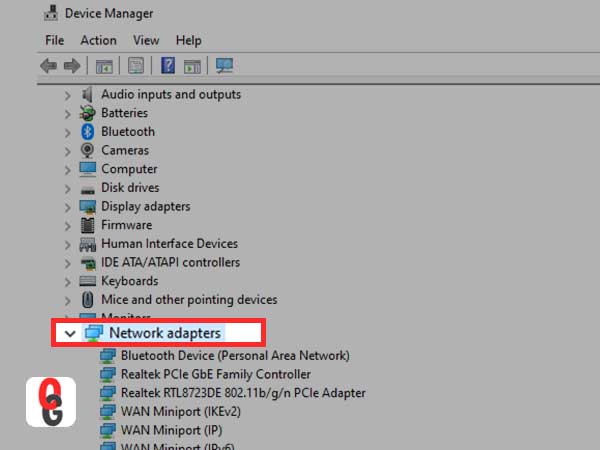
- From the device manager, expand the network adaptors menu to proceed further.
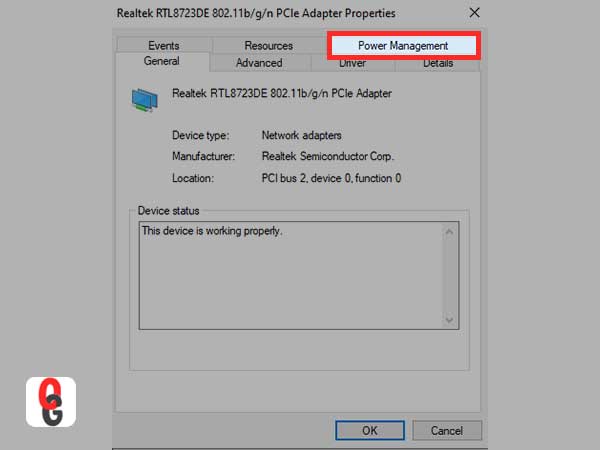
- For the next step, right-click on the adaptor that seems to be the reason behind the issue and click on its properties.
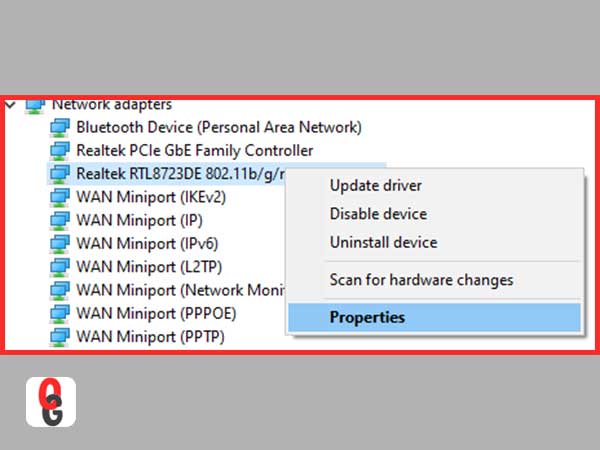
- From the properties window, click on the power management tab and tick the option that says “allow the computer to turn off his device”

Method 2- Disable the wake timers
Let us take a look at the steps that can help you to carry out this method;
- Open your run dialogue box by pressing Windows+R keys simultaneously, to begin with.
- Now, enter this command in the search box, “control.exe powercfg.cpl,,3” to open the power options of your system.

- In the next window, double-click on the sleep option to expand its menu.
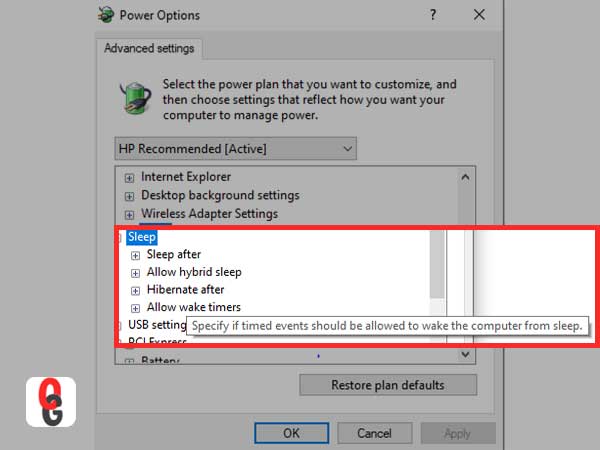
- From there, you will need to double-click on “allow wake timers” and click on disable.
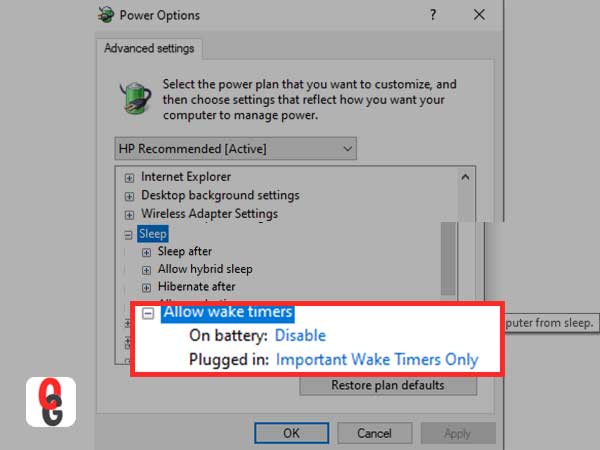
In case you are using a laptop, disable both the “on battery” and “plugged in” options.
Method 3- Allow the computer to sleep
Before you begin with this, you need to make sure that the basic power settings are set to default so to make sure that your PC can sleep. It is often seen that third-party software messes with the settings and makes changes that can further lead to issues such as the Windows 10 sleep mode is not working.
You can make good use of the steps given below to set your power settings to default;
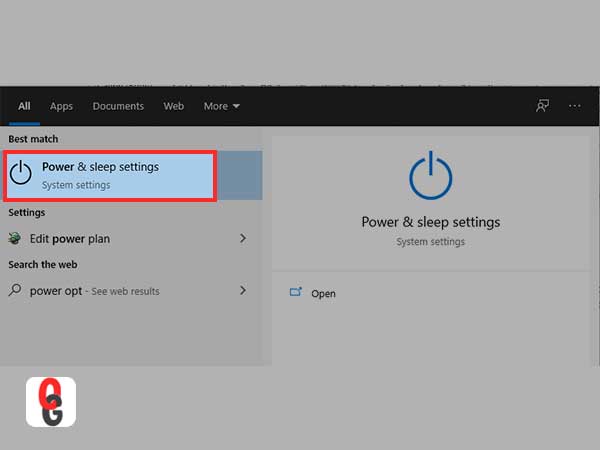
- Open your windows search box and enter edit power plan, to search for it.

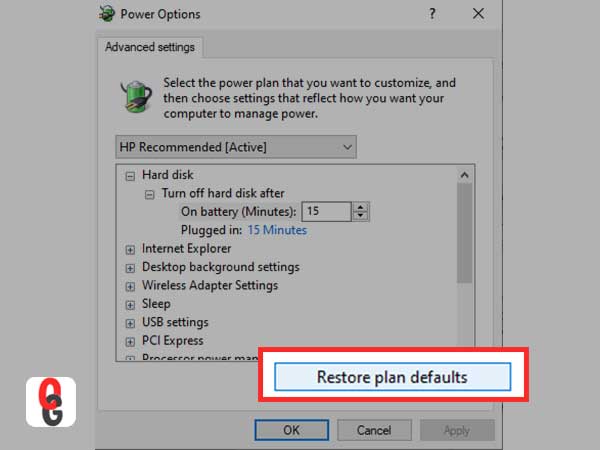
- From the new window that opens up, click on the “Change advanced power settings” option.

- A new window with the name “power options” will appear on your screen. From this window, you will simply need to click on the “Restore plan defaults” option.
- Next, you can also expand the “multimedia settings” option from the power options window. Simply expand the “when sharing media” option and then select the “allow the computer to sleep” option for both “on battery” and “plugged in” options.
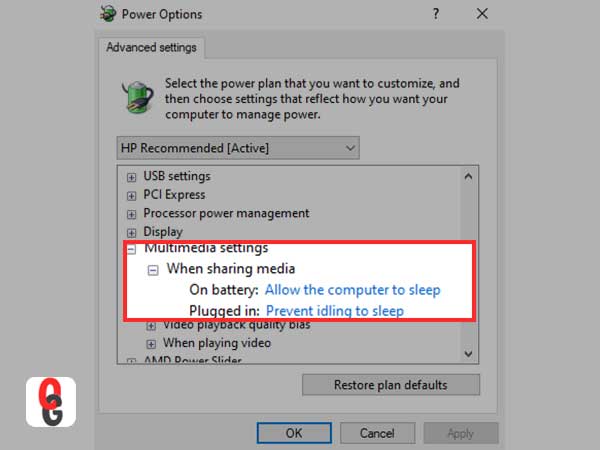
Note: Two options will not appear on your screen in the “when sharing media” menu in case you are using a PC. Only a single option will be available here. Simply select the “allow the computer to sleep” option.
Once you have applied all the changes, click on ok to make them permanent. Check to see if you can put the computer to sleep.
Method 4- Disable the fast startup
This is one of the many useful features of Windows 10. In this, the system saves an image of all the kernels and loaded drivers in C:/hiberfil.sys file. The moment you restart your PC, it will simply resume them directly from the C:/hiberfil.sys file.
Although some older laptops and PCs may not be compatible with this feature which may lead to errors like “computer won’t go to sleep”.
You can follow the steps to simply disable the fast startup.
- Open your search bar and search for Power Options.
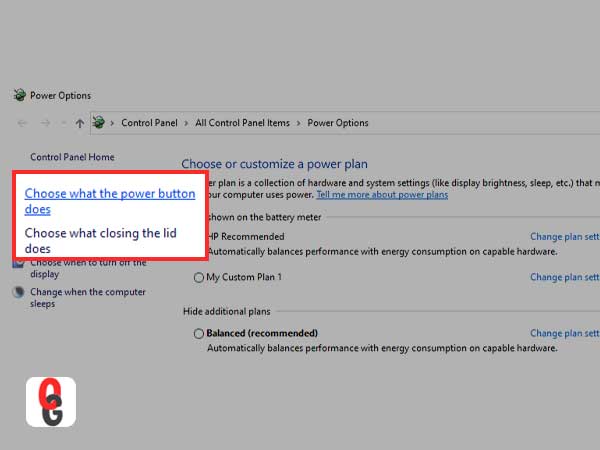
- Now, click on the “additional power settings” from the left side of the screen.

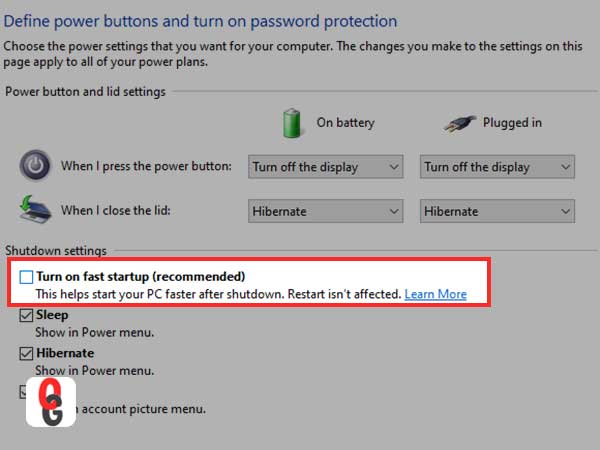
- Next, click on the option that says “Choose what power buttons does” that is on the top left side of your screen.
- In the next window, you will need to click on “change settings that are currently unavailable”.
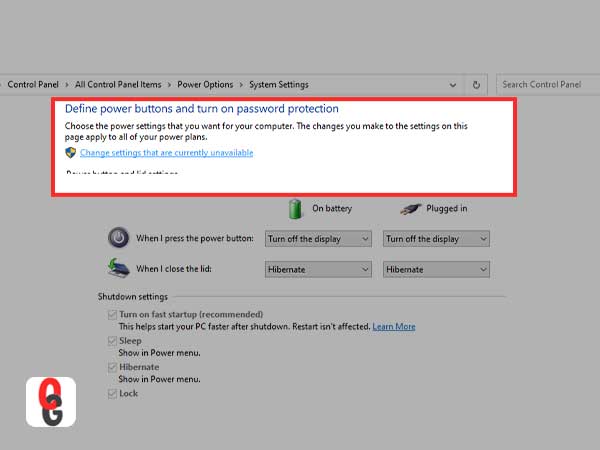
- From there, simply untick the fast startup checkbox (Recommended).
Method 5- Disable the screen saver
Here are the simple steps to carry this method when the computer won’t stay asleep.
- Similar to other methods, search for change screen saver options, to begin with.

- Now, select none from the drop-down menu.

Method 6-Take a look at the sleep settings
You can make good use of the steps given below to check the sleep settings when your Windows 10 system won’t sleep automatically.
- Use Windows+R keys together to open the run dialogue box.
- Simply enter “powercfg.cpl” in the search box and click on ok.

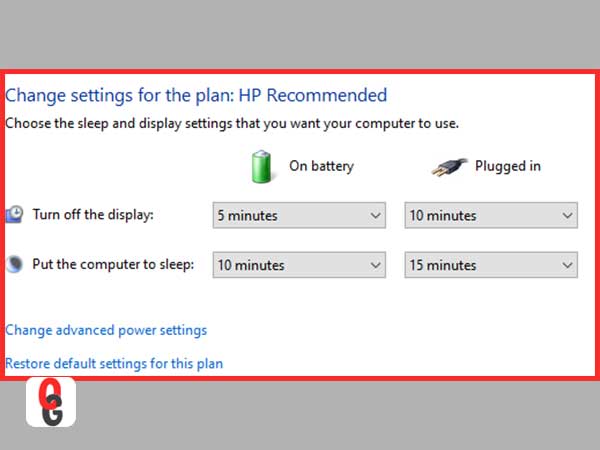
- From the page that appears, you will need to direct yourself to the left side of your screen to select the “choose when to turn off the display” option.

- Now, simply take a look at the settings to check if they are correct or not, and if they aren’t, simply correct them to finish.
Method 7- Perform a clean boot
There may be a possibility that your Windows 10 computer won’t go to sleep due to third-party software installed on it. To fix this, you will simply need to boot your system in clean boot mode. The clean boot mode simply ensures that your system starts with only the windows programs and services that are essential.
This further makes sure that no third-party software would start once your PC starts. Clean boot mode will simply take care of any third-party software that may interrupt the PC from going into sleep mode.
If the error still exists, move on to the next method.
Method 8- Use the windows troubleshooter to fix when windows 10 is not sleeping
Troubleshooting your Windows can also fix this error as it is known as a very effective method for Windows 10. The method is quite easy to carry out. All you need to do is to carry out the steps that are given below;
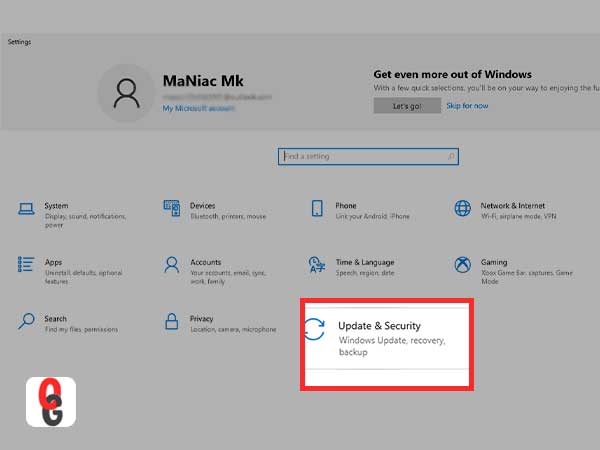
- Press the Windows+I key together to open the settings of your choice.
- From the settings tab, click on the update and security menu.
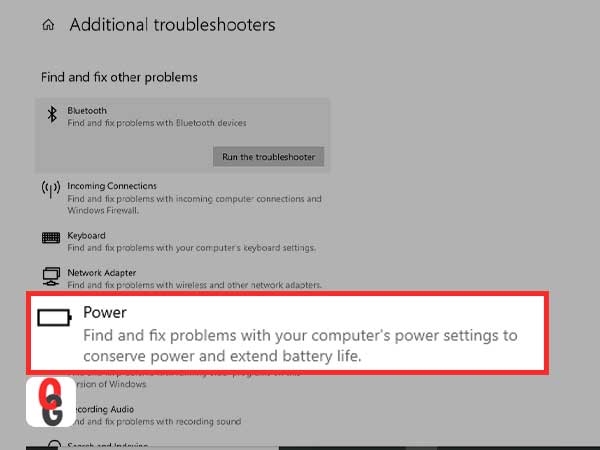
- Now, select the troubleshoot menu from the left side of your screen click on the “additional troubleshooters” option to proceed further.
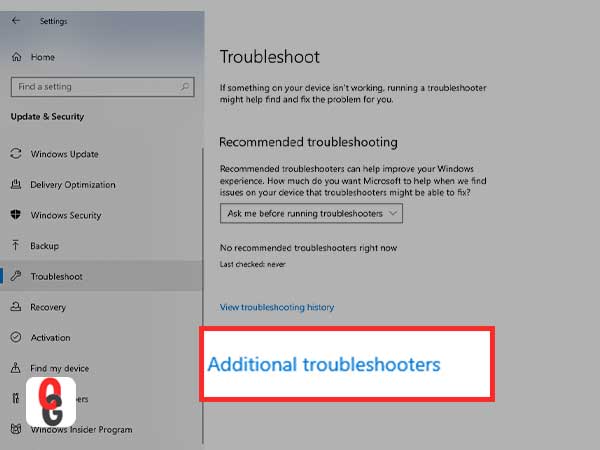
- In the next menu, simply click on the power option from the list of available options.
- Now, expand the power option to select the “run the troubleshooter” option.
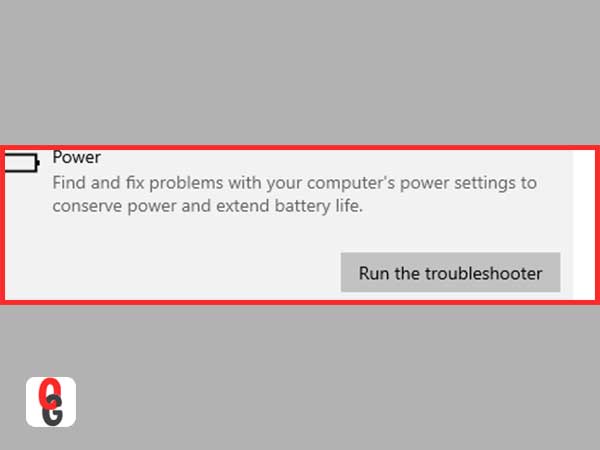
- Wait for a couple of minutes while the troubleshooter is completing the operation.

After doing so, you will need to check if the sleep option works or not.
Method 9- Update your Windows 10
The use of outdated windows device drivers may also be the reason behind this sleep issue in Windows 10. Simply updating your Windows 10 to its latest version will simply update all of the drivers of your PC.
The sleep mode may start working fine once the update is complete. If for some reason, the issue still exists, move forward to use the next method.
Method 10- Disable the hybrid mode
The option to enable or disable the hybrid mode is available just under the power options. In simpler terms, this mode is a brilliant combination of Hibernation and sleep modes. If the hybrid mode is on, it may interrupt your PC from going to sleep.
You can fix this by simply disabling the hybrid mode with the help of the steps given below;
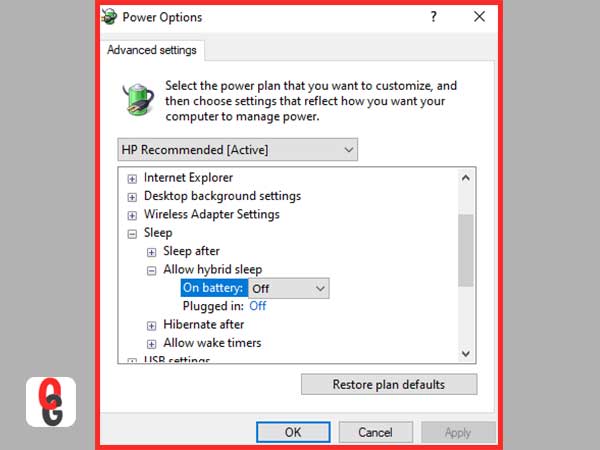
- First off, you will need to follow steps 1 to 3 from Method 1. Doing so will simply open the advanced power settings.
- From the menu, find the sleep option and expand it. From the sleep menu, you will need to expand the “allow hybrid sleep” option and from the options available in the drop-down menu, choose “off”.
After you have done so, simply click on ok to save the changes made in the settings. All you need to do is to restart your PC and then check if the error is fixed or not.
These are some of the best methods that can fix the sleep issue for Windows 10 with relative ease. If the methods mentioned above are of no help to you, you can also take a look at the two additional methods that are mentioned below.
Additional Troubleshooting Methods
Method 11- Scan your PC for viruses and malware
The existence of a virus or malware on your system is quite possible. Virus attacks can generally affect the normal functioning of your system, with the inclusion of the Windows 10 sleep issue also being a possibility.
To avoid this from happening, you will need to install a premium antivirus for your system and scan your system for potential malware or virus. If there are no threats detected in the scan, then your system is completely protected.
Method 12- Disconnect the Peripheral devices
It is also a possibility that some peripheral devices that are connected to your system may be causing this issue. All you need to do is to disconnect or remove these peripheral devices to get rid of this issue.
You do not need to remove essential devices such as mouse and keyboard as they do not cause an issue, instead, you should remove devices such as printers, webcam, scanner, external DVD, etc. that are connected with your system to check if the Windows 10 sleep issue is fixed.
Conclusion
Windows 10 is a great operating system but it is far from being perfect. There are tons of errors and bugs that can cause inconvenience to the users. The sleep error being one such issue.
Although the error can be easily fixed with the help of the methods that have been mentioned in the blog so the user can have total control over the actions on his system.
Likewise, you can also read about: Can’t Click Anything On Windows 10 Desktop? Consider This Comprehensive Guide

How to Record Video with Webcam on Windows/Mac?

How to Organize Windows 10/11 Desktops Effortlessly?

How to Enhance Your Laptop Performance

The Use of Drawing Tablets and Computers

Implications of Android Apps Running Natively on Windows…
How to Fix Drive is Not Accessible Error…

Can’t Keep Up with Windows 10 Update Errors?…

Useful Tips: Deciding Between a Laptop and a…
Steps to Turn off Windows Defender

Microsoft Is Discontinuing Support for OneDrive in Windows…

Can’t Click Anything on Windows 10 Desktop? Consider…